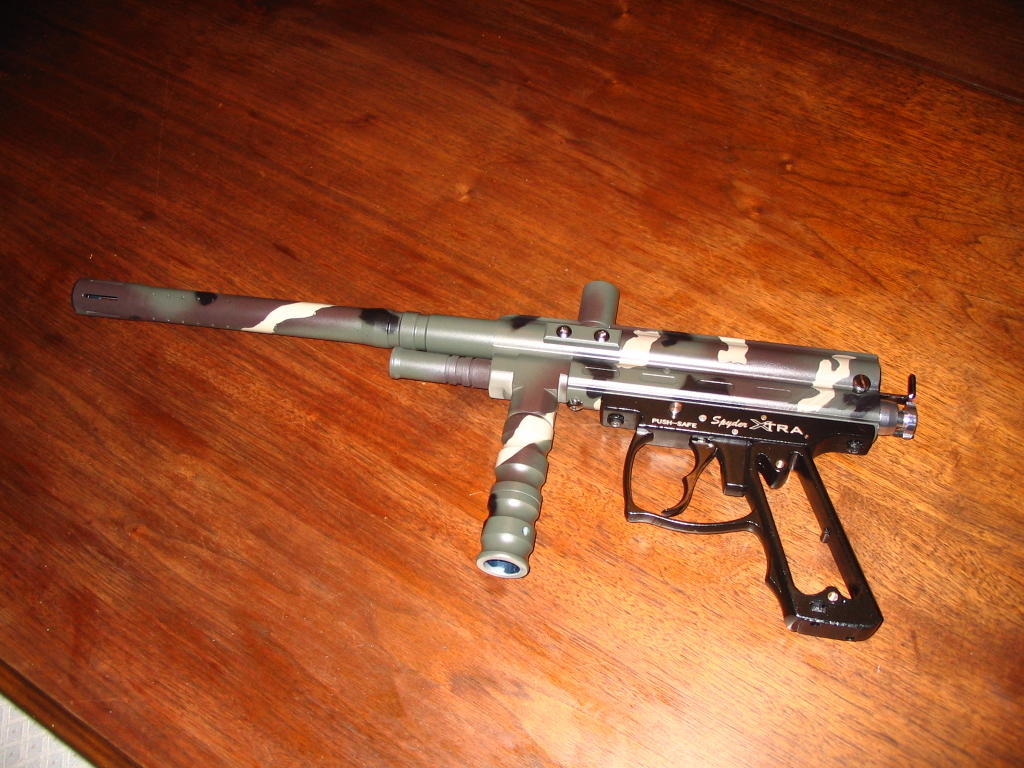
After all this hard work putting together an awesome woods course I realized that hey my paintball gun is BRIGHT BLUE. I figured I needed o change that so the weekend before last I embarked on operation : CAMO. That's right, I looked at every camouflage pattern known to man and decided the good ole American Woodland pattern was best for me. After picking up the appropriate camo paint at my nearest Lowe's I began the long task of sanding, priming and layering paint and patterns.
Step 1: Sand the smooth surface with some 300 grit sandpaper to create a rough surface so the paint can bond to the metal.
Step 2: Tape off the inside of the gun. You don't want paint messing up the mechanics of the marker.
Step 3: Prime. I used two thin coats to cover more even. If you want a smooth finish you may want to sand very easily between coats, but I needed a more flat finish so I just sprayed one over the other.
Step 4: Spray the lightest color. This makes since because darker colors cover better. In my case it was the beige color. Two coats should do.
Step 5: Mask the the areas where you want the light color to be and trim out the desired pattern. Be careful not to cut into the paint as I did. If you do you can just touch t up with a detail brush or a toothpick.
Step 6: Spray on the green. Since green is on of the primary colors in the pattern you want it to cover about 50% of the object. Two coats.
Step 7: Spray the brown. Instead of masking again, I just free handed the brown. Just as with the green, brown should cover about 50% of the object. Two coats.
Step 8: I went ahead and unmasked the beige to decide on the placement of the black blobs. For the black I made a stencil out of paper and just taped it over the marker. Two coats. If I ever do this again I believe I will use a variation of this masking method over the cut tape. It was easier to take off and there is no risk of cutting into the paint.
Step 9: Clear coat. I used an acrylic clear coat. Three coats this time. This coat makes more of a difference than you may think. Not only does it protect your work but it blends and richen the paint for a nice finish.
Overall, I am very pleased with the outcome. I have to admit I was a little worried but it came together nicely. Now we will see how well it holds up. My only concern is how well the paint bonded with the metal. I think some sort of etching method might help the process but you have to go with what you got and this is what I've got.

1 comment:
Hahahaha, do you want porn? Best blog comment spam ever!
9-12-05? That's a long time to neglect your blog Stal.
We'll go camping soon. I promise.
Post a Comment